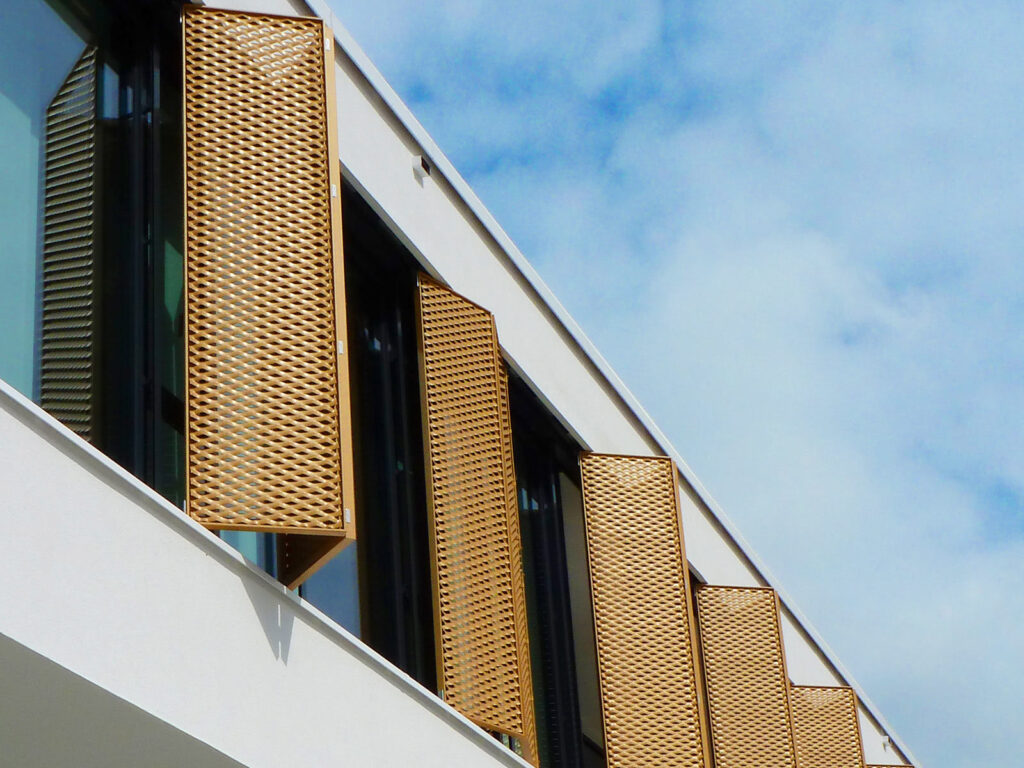
Sliding shutters add both impressions of the home and simple functionality as they keep the space in darkness. If they are not placed in a bedroom which is in the south part of the house, then probably you will have restless sleep. Look through remvital, its features and benefits to avoid this.
Follow the instructions listed below to get the perfect sliding shutters you’ve dreamt of.
SHOPPING LIST
A – 25mm X 3mm Aluminium profile (we used a 6m length)
B – 19A (19mm) Aluminium guide channel (fixed to the bottom of shutters – we used a 1.8m length)
C – 96mm X 22mm Meranti (end panels – we used 2 X 1.8m lengths)
D – 22mm X 22mm Meranti (for spacer blocks – we used 1 X 1.8m length)
E – 44mm X 22mm Meranti (narrower strips- we used 18 X 1.8m lengths)
OTHER
Hillaldam 100TF timber door hangers (two per shutter)
Hillaldam 100G galvanized steel top track
83/19N door guide brackets
SIDE FIXING BRACKETS
- 101AC track stop
- 40mm Hilti wall anchors (to fix door guide brackets)
- 100mm Hilti wall anchors (to fix side fixing brackets)
- 5 X 16mm stainless steel bolts (for fixing brackets to track)
- 5mm stainless steel hex nuts (for fixing brackets to track)
- 5 X 60mm stainless steel chipboard screws (to fix Aluminium angle to end panels)
- 40mm chipboard screws
- Waterproof wood glue
- Paintbrush
- UV resistant wood treatment product
EQUIPMENT
- Electric drill, screw bit extension
- 5.5mm steel drill bit, 10mm masonry drill bit, 3mm wood drill bit and countersinking bit
- Hacksaw
- Mitre box
- Mitre saw (optional)
- G-clamps
- Tape measure
- Pencil
- Tri-square
- Spirit level
- Ladder(s)
PROJECT NOTES
This project does not require major skill for the construction of the shutters but an extra pair of hands will definitely be necessary when hanging the rails.
The measurements and quantities of fittings listed above apply to a window measuring 1700mm X 1200mm and were quantified to create 2 shutters to cover 1800mm X 1400mm (slightly larger than the window opening). Adjust these to suit the size and number of shutters you want to create.
We created two different sized shutters to cover the window, as a wall hampers the space to the left of the window. It measures 700mm x 1400mm and the other 1100mm X 1400mm.
GET STARTED
1 Measure the window opening(s). We included the sill in our height measurement, as we wanted the shutters to extend level with the bottom of the sill.
2 Place the lengths of 96mm X 22mm and 44mm X 22mm planking next to each other, then measure and mark the lengths you will need for your shutters. Use a tri-square to make sure your markings are at 900. Use a miter saw to cut the required lengths.
We needed:
2 X 1100mm X 96mm X 22mm
2 X 700mm X 96mm X 22mm
18 X 1100mm X 44mm X 22mm
18 X 700mm X 44mm X 22mm
3 Use the miter box and hacksaw to cut the lengths of 19mm aluminum guide channel (B) you will need. We used a 1.8m length and cut it to give 700mm and 1100mm sections.
4 Fix the sections of guide channel to the narrow edge of two 96mm X 22mm sections (C) using the 40mm chipboard screws. First, drill 5.5mm holes in the underside of the channel and then countersinking these holes. Drill corresponding 3mm pilot holes in the wood before using the screw-bit extension to drive the screws home.
TIP
Space the screws at roughly 150mm centers, but make sure to start spacing the screws 40mm from the ends to allow for the screws in step 6.
5 Fix two door hangers to each of the two remaining 96mm X 22mm sections (C). Fix these at least 40mm from the ends to allow space for the screws in step 6.
6 Use the miter box and hacksaw to cut the 25mm X 3mm aluminum profile to the required lengths.
REMEMBER
Make allowance for the guide channel in your total measurement
Now use the 60mm stainless steel chipboard screws to fix the Aluminium profile to the end panels, creating a frame with the top (to which the hangers are fixed) and bottom (to which the guide channels are fixed) panels facing outwards. Apply the same fixing method as in step 4 to attach the profile to the 96mm X 22mm sections, as shown.
TIP
Use a G-clamp to hold the plank in place when drilling and screwing.
7 Cut the 22mm X 22mm length of Meranti into 22mm lengths. You will use these as spacers to create the slatted appearance. Place the 44mm X 22mm sections within the frame, with spacer blocks in between, as shown. Fix these in place with waterproof wood glue. Leave on a flat surface overnight to dry.
8 Use the 5 X 16mm stainless steel bolts and nuts to fix the side fixing brackets to the track at 300mm centers. Use the 5.5mm drill to create the necessary holes. Once all the brackets are in place, hold the track in place against the wall at the correct height above the window opening. You will need an extra pair of hands for this.
9 Hang the shutters by sliding the door hangers into the track. Fix the track stops in place so that the shutters will open to the required positions. Use the 40mm Hilti wall anchors to fix the door guide brackets to the wall, as shown.
10 Use the paintbrush to coat the shutters with a UV resistant wood treatment product.